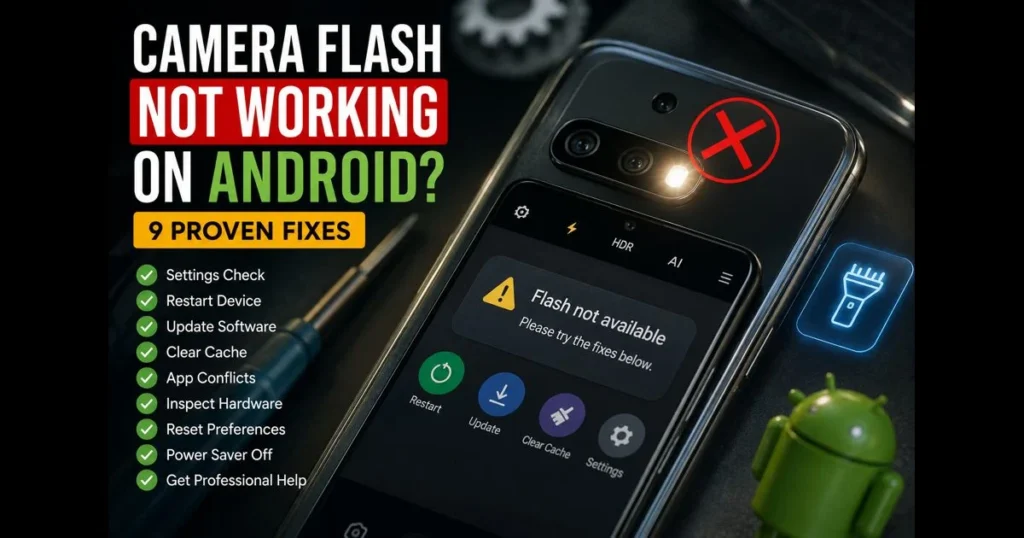
If your Camera flash isn’t working on your Android device, you’re not alone. Whether the flash won’t activate in the Camera app or your torch tile is grayed out, it often happens at the most inconvenient times. Fortunately, most issues stem from software quirks or settings misconfigurations that you can troubleshoot at home. This guide covers practical Android camera fixes you can try immediately, from checking often-overlooked camera settings to identifying potential app interference. If it turns out to be a hardware issue, you’ll know what to check before reaching out to support.
Grab your phone and follow along. Start with quick wins and then dive deeper into troubleshooting. Related reading: allow flash access android.
- Understanding the Issue
- Check Camera Settings
- Restart Your Device
- Update Your Android Software
- Check for Third-Party App Conflicts
- Clear Camera App Cache and Data
- Inspect Hardware for Damage
- Reset App Preferences
- Seek Professional Help
1. Understanding the Issue
Common reasons why the camera flash may not work
“Why won’t my flash fire?” It’s often less mysterious than it seems. Here are frequent culprits behind an Android flash not working: (See: Android Official Site.)
- The flash is set to Off or Auto, and the scene isn’t dark enough for activation.
- Power-saving settings may restrict high-power components, effectively disabling the LED for photos or torch use.
- Your device could be hot or low on battery. Thermal management and power protections can temporarily block LED use to prevent damage.
- A third-party app might be using the camera or torch in the background, such as barcode scanners or social media apps.
- A case or debris may be covering the LED, casting a shadow and making it appear inactive.
- Permissions could be misconfigured after an update or restore; you might need to re-open the Camera app and grant access again.
- There could be a hardware issue, such as liquid damage, a cracked module, or a failed LED.
As a quick diagnostic, open the Quick Settings tile and try the torch. If the flashlight isn’t working either, your issue likely lies at the system or hardware level. Related reading: battery saver flash disabled.
Differences between camera flash and flashlight functionality
The flash for photography is a brief, high-intensity strobe controlled by the camera stack, while the flashlight (torch) is a steady-on LED managed by the system service. This distinction is crucial.
If the torch works but the camera flash doesn’t, the problem may be rooted in the camera app settings. If neither functions, focus on system or hardware issues.
2. Check Camera Settings
How to access and adjust camera settings
Open your default Camera app. On most devices, you’ll find settings via a gear icon within the viewfinder. Many camera issues can be resolved in seconds here.
- Look for a lightning bolt icon in the viewfinder to toggle flash modes.
- Open the gear icon to find advanced options like scene optimizers and exposure adjustments that can affect flash functionality.
- If you’re using a Samsung device, search within camera settings for “Flash” to check if any shooting mode is overriding it.
- On Google Pixel and other models, flash controls often appear near the top of the screen or in a quick menu within the viewfinder.
Also, revisit permissions. Ensure the Camera app has Camera permission enabled. While some guides suggest allowing flash access, the LED is managed under the Camera hardware stack; confirming that Camera permission is granted is essential.
Ensuring flash mode is enabled
Set the flash to On (not Auto) to perform a test. Take a photo in a dim room with your hand covering the lens to force low-light behavior.
Experiment with different modes. Portrait or Night modes may suppress flash to prioritize noise reduction. Switch to Photo/Pro mode and toggle the flash to On. If it fires, you’ve identified a mode-level override.
3. Restart Your Device
Benefits of a simple restart
A reboot can clear stuck camera sessions, release the LED from background processes, and refresh drivers. Many “flash not activating” problems resolve after a single restart.
How to perform a soft reset on your Android device
- Hold the Power button (or Side key) until the power menu appears, then tap Restart.
- If you don’t see Restart, power off fully, wait 30 seconds, and turn it back on.
- On some models, press and hold Power + Volume Down for about 10–15 seconds to force a soft reset.
After rebooting, test the flash in both the Camera app and the torch tile.
4. Update Your Android Software
Why keeping your software up to date is crucial
Camera and LED control rely on system frameworks and vendor camera drivers. An Android software update often includes important stability fixes. If your flash stopped working suddenly, a pending update might be the solution.
Check for updates to your Camera app in the Play Store as well; OEM camera apps receive fixes independently from system updates.
Steps to check for and install updates
- Open Settings and search for “System update” or “Software update.”
- Connect to Wi-Fi and ensure sufficient battery life or plug in.
- Download and install available updates, then restart when prompted.
- Open the Play Store, go to your profile, and check for updates available for the Camera app and related components.
After updating, retest the flash in a dark environment with the flash set to On.
5. Check for Third-Party App Conflicts
Identifying apps that may interfere with the camera flash
Apps that utilize the camera or torch can block the LED, even if they’re running in the background. Common offenders include barcode scanners, video calling apps, and flashlight utilities. These can create classic third-party app interference.
Look for signs: if the torch toggle flickers off immediately or if the Camera app reports “can’t connect to camera,” consider the timing of any recently installed apps.
How to test for app conflicts
- Force close suspicious apps: open Recents, swipe them away, then go to Settings > Apps > select the app > Force stop.
- Boot into Safe mode. On most phones, press and hold the power button, then touch and hold Restart until you see the Safe mode prompt. Confirm to reboot.
- Test the camera flash and the torch. If they work in Safe mode, uninstall or disable recently added apps one by one until the problem disappears in normal mode.
- Check special access: Settings > Apps > Special access > Camera access. Revoke access for apps that shouldn’t require it.
If you rely on a specific app causing issues, see if you can disable any LED or camera toggles in its settings.
6. Clear Camera App Cache and Data
The importance of clearing cache for app performance
Corrupt cache files can lead to unpredictable behavior in the Camera app. Clearing them forces the app to rebuild its data and often resolves issues like a non-firing flash.
If cache clearing doesn’t help, resetting the app’s data can fix misapplied flags after updates. Your photos will remain safe, but you will lose custom modes and preferences.
Step-by-step guide to clear cache and data for the camera app
- Open Settings > Apps (or Apps & notifications) > See all apps > Camera.
- Tap Storage & cache (or Storage).
- Tap Clear cache.
- Retest the flash. If it’s still not working, tap Clear data or Clear storage, then reopen the Camera app and reconfigure your preferences.
While you’re there, check permissions to ensure the Camera app is allowed access. If your device is managed by an organization, ask your admin to allow flash access in policy.
7. Inspect Hardware for Damage
How to check for physical damage to the camera module
Hardware issues can mimic software bugs. Spend two minutes on a visual inspection:
- Remove the case to ensure no ridge or magnet is blocking the LED window.
- Shine a light on the flash window; look for cracks or lint.
- Clean the LED cover and camera glass with a microfiber cloth.
- Check for moisture alerts or corrosion around ports; recent liquid exposure can disable the LED until fully dry.
- Test the torch against the camera flash. If the torch works but the camera flash does not, focus on the camera stack; if neither works, consider LED or power circuit issues.
Many manufacturers provide diagnostics. For instance, Samsung Members has a Diagnostics section to test hardware features. If the flash test fails, you may need a repair.
When to consider professional repair services
If you’ve tried the above steps and the LED still won’t light, or if there’s visible damage, schedule a repair. Camera LED and module repairs are routine for authorized service centers.
Back up your data before your visit. Bring proof of purchase and describe the symptoms clearly: torch behavior, specific modes where the flash fails, and any error messages. Clear details help technicians diagnose the issue more quickly.
8. Reset App Preferences
What resetting app preferences does
Resetting app preferences restores disabled system apps, default apps, background data limits, and permission prompts—without deleting personal data. If a crucial system component controlling the LED was disabled, this reset brings it back.
This reset can be particularly useful after heavy customization or when camera issues arise after experimenting with defaults.
How to reset app preferences on your Android device
- Open Settings > Apps.
- Tap the three-dot menu (top right) and choose Reset app preferences.
- Confirm; you’ll need to reselect defaults later.
After resetting, open the Camera app, grant permissions if prompted, and test the flash. If you see a permission dialog, allow flash access to ensure the app can control the camera hardware correctly.
9. Seek Professional Help
When to consult a technician for camera flash issues
If Safe mode, cache and data resets, and updates didn’t help—and you’ve ruled out modes and power settings—hardware or firmware calibration may be the problem. That’s when it’s time to call for support.
Contact your phone manufacturer’s support or visit an authorized repair partner. Mention whether the torch works but the flash does not and whether the failure started after a drop or liquid exposure.
Exploring warranty and repair options
Check your warranty status and any device care plans. Manufacturer warranties generally cover defects but not accidental damage. If out of warranty, request a quote detailing whether the LED assembly, camera module, or main board needs replacement.
Before handing over the phone, disable screen locks if required and remove SIM and microSD cards. Choose a repair route: factory service, authorized local technician, or carrier repair desk, each with different turnaround times and costs.
Extra pointers to try before a repair
Two quick checks can save you a trip:
- Turn off Battery Saver and any vendor Power Saving modes. Some profiles can prevent the LED from triggering.
- Test with a different camera app. Install a reputable third-party camera from the Play Store, grant permissions, and force flash to On. If it works, your stock app may need an update or reset.
On Samsung devices, also access Quick Settings and long-press the Flashlight tile for intensity options, then check samsung flash settings in the Camera app to ensure no shooting mode overrides are active.
Troubleshooting checklist (quick reference)
Short on time? Follow this order:
- Force the flash to On in the Camera app and test in a dim room.
- Toggle the torch in Quick Settings. If the torch fails too, consider system or hardware issues.
- Restart the phone.
- Disable Battery Saver/Power Saving and cool the device if it’s hot.
- Update system software and the Camera app.
- Test in Safe mode; remove conflicting apps.
- Clear Camera cache; if needed, clear data.
- Reset app preferences.
- Inspect hardware; book a repair if damage is suspected.
If your phone is managed by work or school, ask IT to allow flash access and confirm no policy disables the torch or Camera hardware.
Why this happens—and how to keep it from returning
Flashes fail for three broad reasons: configuration, contention, or condition. Configuration involves modes and permissions. Contention occurs when multiple apps attempt to access the camera or LED. Condition relates to heat, battery, or physical damage.
To prevent issues, keep your device updated, be selective with flashlight and camera-adjacent apps, avoid prolonged shooting in high heat, and check your case fit around the LED cutout. This simple maintenance keeps “Android flash not working” episodes rare.
If you switch brands or reset your phone, remember to revisit camera settings—flash mode, HDR, and any vendor scene modes—so the app behaves as you expect from the start.
Wrap-up
You now have a comprehensive playbook to fix a stubborn flash: confirm settings, reboot, apply updates, rule out third-party app interference, clear cache and data, and inspect hardware. These steps will resolve most instances of flash malfunctions. If your tests point to hardware issues, don’t hesitate to schedule a professional diagnosis and lean on your warranty if applicable.
Ready to tackle this problem? Go through the checklist above now; if the issue persists, contact your manufacturer’s support for a repair appointment today.
Frequently Asked Questions
Why is my camera flash not working on my Android phone?
There could be several reasons for your camera flash not working, including software glitches, low battery, or camera app settings. It’s advisable to check if the flash is enabled in the camera settings and to restart your device.
How can I fix the camera flash issue on my Android device?
To fix the camera flash issue, try clearing the camera app cache, updating your phone’s software, or resetting your camera settings. If the problem persists, consider testing the flash in other apps or performing a factory reset.
Could a hardware problem be causing my Android camera flash to malfunction?
Yes, a hardware issue such as a damaged flash bulb or faulty connections can prevent the flash from working. If you’ve exhausted software troubleshooting steps, it may be necessary to visit a repair service for further inspection.