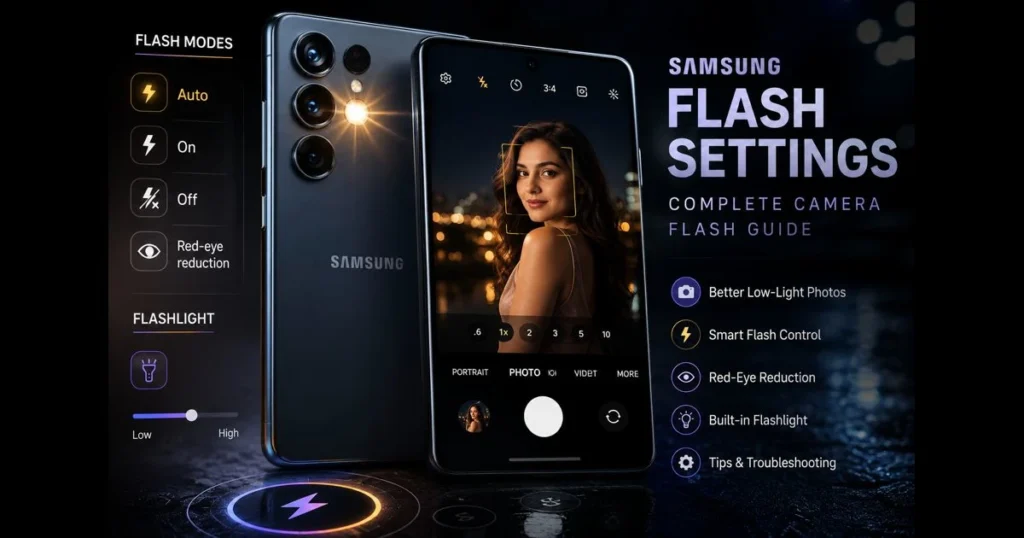
Mastering Samsung flash settings can significantly enhance your photos on a Galaxy phone. Whether you’re capturing a quick portrait at dinner or a moving subject indoors, knowing when and how the flash fires is crucial. This guide covers Samsung camera flash options in the Camera app, what each mode does, and how to tweak settings for cleaner, more flattering results. You’ll also discover how to use the phone’s flashlight beyond photography, troubleshoot common issues, and implement practical flash photography tips that apply to everyday scenes. If you’ve struggled with blown-out faces or harsh shadows, read on. With a few clear habits and some experimentation, you can turn that tiny LED into a reliable tool for balanced, confident low-light photography. Related reading: allow flash access.
- Overview of Samsung Camera Flash
- Accessing Flash Settings on Samsung Devices
- Understanding Flash Modes
- Adjusting Samsung Flash Settings for Optimal Performance
- Utilizing Samsung Flashlight Settings
- Common Issues and Troubleshooting Flash Settings
- Best Practices for Using Samsung Flash
- Conclusion
1. Overview of Samsung Camera Flash
Importance of flash in photography
Flash exists to solve a simple problem: your subject is too dark for a clean capture at hand-held shutter speeds. While phone sensors have improved, physics still matters. Without extra light, you risk blur, noise, or both. A well-timed burst from the Samsung camera flash can freeze motion, lift shadows on faces, and balance a bright background with a backlit subject. Used thoughtfully, flash can act as subtle fill light, preserving atmosphere while ensuring people look more awake and defined. (See: Samsung Electronics – Wikipedia.)
Types of flash available on Samsung devices
Most Galaxy models—including the flagship Galaxy S series and the productivity-focused Note series—feature a rear LED flash for the main camera and a “screen flash” for selfies, which briefly brightens your display to illuminate your face. In Video mode, some phones provide a continuous “torch” option that keeps the LED on while recording. You’ll also find a red-eye reduction toggle and scene detection features that can influence flash usage. These options are part of Samsung’s suite of camera features designed to simplify low-light photography. Related reading: allow flash access android.
2. Accessing Flash Settings on Samsung Devices
Navigating the camera app settings
Open the Camera app and tap the gear icon to access Settings. Here, you’ll find options related to flash behavior, red-eye reduction for the selfie camera, and screen flash customization. Settings can vary by model, so focus on the essentials: enabling red-eye reduction, deciding whether the camera remembers your last flash choice, and checking if any scene optimizer is controlling the flash automatically. Related reading: camera flash not working android.
Quick access to flash settings from the camera interface
The fastest route is the lightning bolt icon on the main viewfinder. Tap it to switch between Auto, On, and Off. On some models, pressing and holding the icon opens further options, such as a quick toggle for red-eye or a shortcut to screen flash on the front camera. Remember, your choice can be mode-specific—changing flash in Photo mode won’t necessarily affect Portrait or Pro, so set it according to your shooting mode. Related reading: samsung flash notification.
3. Understanding Flash Modes
Auto flash: when and why to use it
Auto is your set-and-forget option when moving through mixed light. The phone meters the scene and decides whether the LED should fire. Note that Auto behavior can vary by Galaxy model, sensor capabilities, and Samsung’s processing (such as Scene Optimizer); newer devices may be more conservative or aggressive with flash based on their hardware and software. Use it for casual indoor shots or when you’re unsure if ambient light is sufficient. Auto protects you from unnecessary flash in bright spaces while stepping in when there’s a risk of blur. It’s the most forgiving smartphone flash mode for everyday use.
On and off flash settings: controlling light exposure
Use On when you need fill light—think backlit portraits or dim restaurants. It prioritizes freezing motion and brightening faces. Choose Off to preserve ambient mood or when reflective surfaces might cause glare. Off pairs well with Night mode or tripod shots, where the camera gathers light over time.
Red-eye reduction feature and its benefits
Red-eye occurs when light bounces off the retina and back into the lens, especially with direct flash in dark rooms. Red-eye reduction helps by pre-flashing or adjusting timing to constrict pupils. Activate it for indoor portraits and pet photos, then evaluate results. If you prefer post-processing, Samsung’s built-in editor often includes a red-eye fix you can apply after the shot.
4. Adjusting Samsung Flash Settings for Optimal Performance
Choosing the right flash mode for different lighting conditions
Outdoors at dusk? Try Auto, but be ready to switch to On for backlit faces. In bright sunlight, use On for subtle fill that softens shadows under eyes and hats. For candlelit dinners or concerts, Off plus higher ISO and stabilization might better protect the scene’s warmth, while a quick On can freeze a toast or a moving performer. Think in terms of balance: flash should support ambient light, not erase it.
Tips for using flash in low-light environments
- Mind the distance. Phone LEDs are most effective within arm’s length. Step closer instead of cranking settings.
- Diffuse the light. A thin white receipt or tissue in front of the flash can soften harsh highlights.
- Control exposure. Use the on-screen exposure slider—tap to focus on your subject, then drag the sun icon down slightly before firing the flash to avoid blown skin tones.
- Watch for reflective surfaces. Glass and glossy materials can bounce flash straight back. Change your angle or disable flash.
- Consider Night mode without flash for static scenes. For people, though, flash helps freeze motion that Night mode might smear.
These small choices can transform “phone flash” photography into a clean, natural result in low-light situations.
5. Utilizing Samsung Flashlight Settings
How to access and customize flashlight settings
Swipe down from the top to open Quick Settings and tap the Flashlight tile. Many Galaxy phones allow you to press and hold that tile to adjust brightness levels, from a gentle glow to a stronger beam. If you don’t see it, tap the pencil/Edit icon and drag Flashlight into your first row for easy access. You can also use voice control via Bixby or Google Assistant—just say, “Turn on the flashlight.”
Different flashlight modes and their applications
Use lower brightness for close-up tasks like reading a label, and higher levels for walking the dog or checking a dark car trunk. In Video mode, look for a torch icon to keep the LED on while recording; it’s useful for quick how-to clips. Samsung also includes a flash notification feature that blinks the camera LED when calls or notifications arrive—helpful if you often miss sound or vibration alerts.
6. Common Issues and Troubleshooting Flash Settings
What to do if the flash doesn’t work
- Confirm your mode. Some camera modes limit flash functionality. Switch to Photo or Portrait and try again.
- Check the flash icon. If set to Off, tap to change to Auto or On.
- Cool down the phone. If the device overheats, the LED may be temporarily disabled. Let it rest a few minutes.
- Clean the flash cover and lens. Smudges can create haze and flares.
- Review app permissions. If a third-party app can’t trigger the LED, it may not have Camera access. Grant the necessary permissions in Settings > Apps.
- Try the stock Camera app. If it works there but not elsewhere, the issue could be app-specific. Update or reinstall the other app.
- Restart the device. A quick reboot often resolves flash issues.
- Clear Camera cache. In Settings > Apps > Camera, clear cache and test again.
If the LED never comes on—even with the Flashlight tile—hardware may be at fault. Back up your data and contact Samsung Support or visit an authorized service center.
Addressing overexposure or underexposure issues
Overexposed faces usually stem from distance and metering issues. Step back slightly, lower the on-screen exposure before tapping the shutter, and avoid aiming directly at reflective backgrounds. Turning off HDR can sometimes prevent overcompensation around bright highlights.
For underexposure, move closer into the flash’s effective range and switch from Auto to On to ensure the LED fires. In Pro or Pro Video modes, choose a lower ISO and let the flash assist to keep noise down. When photographing small objects, angle the phone so the light skims across rather than firing straight on—this increases contrast without losing detail.
7. Best Practices for Using Samsung Flash
Composition tips when using flash
- Prioritize eyes and skin. Tap to focus on the face and slightly reduce exposure to protect highlights.
- Change the angle. A subtle tilt can reduce glare on glasses.
- Use backgrounds that accept light. Matte walls and fabric look better than glass or polished surfaces under flash.
- Fill in daylight. On sunny days, set flash to On for fill that lifts shadows without altering the scene’s vibe.
- Add a quick diffuser. A small piece of translucence between the LED and subject can create a softer glow.
These aren’t gimmicks; they’re practical techniques you can apply quickly with any Galaxy model. Comparable flash performance and tuning also appear on other major smartphones—such as Apple’s iPhone, Google’s Pixel, and Huawei’s P Series—so these best practices translate well across devices.
Timing your shots for the best results
Have your subject take a breath and hold still for a moment. This settles micro-motions that can create blur, even with flash. If people blink when the flash fires, use a 2-second timer to separate the focus/AF-assist light from the actual exposure. For kids and pets, burst mode with flash can be inconsistent; instead, time a single shot when the subject pauses. Another reliable tactic: pre-compose, half-press or tap to lock focus/exposure, then wait for the right moment.
When shooting video in low light, switch on the torch before recording so the camera sets white balance and exposure with the added light. This simple step reduces color jumps in the first moments of your clip.
8. Conclusion
From quick portraits to detailed close-ups, understanding Samsung flashlight settings and core flash options in your Camera app gives you control over light—without needing extra gear. Auto keeps you flexible, On provides reliable fill when necessary, and Off preserves ambience when the moment calls for it. Combine small techniques—exposure tweaks, smart angles, diffusion—and your images will appear intentional rather than improvised. If you’ve read this far, choose one scene you frequently shoot, apply two flash photography tips, and compare the results side by side.
Ready to put your new knowledge to work? Open the Camera app, set your preferred mode, add the Flashlight tile to Quick Settings, and enable flash notifications if visual alerts suit your routine. Then practice: try a backlit portrait, a night tabletop photo, or a reflective surface solved by changing your angle. As you iterate, you’ll develop instincts for when to let Auto decide and when to take charge—transforming Samsung flash settings into an everyday creative tool.
Frequently Asked Questions
What are Samsung flash settings?
Samsung flash settings refer to the configuration options available for the camera flash on Samsung devices, allowing users to customize the flash mode for different lighting conditions.
How do I access flash settings on my Samsung phone?
To access flash settings, open the Camera app, tap the flash icon, and choose from options such as Auto, On, Off, or Red-eye reduction, depending on your needs.
Can I use flash settings in third-party camera apps?
Yes, many third-party camera apps also provide flash settings, but the functionality may vary depending on the app’s design and compatibility with your Samsung device.